Master Your Workflow with Integrated Tasks
Part 1: Understanding & Creating Tasks in Octab
Tasks in Octab are more than just a simple checklist. They are versatile items that can be standalone or even transform your existing resources into actionable items.
Ways to Create Tasks:
-
Within Folders:
- Navigate to any of your Octab folders.
- Look for an "Add Task" button or option within the folder.
-
Directly on the Tasks Page:
- Go to the main "Tasks" page in Octab.
- Use the dedicated "Add Task" button (often a plus icon, as we'll see later).
- Tasks created this way are initially stored in a general "Archive" or default list until categorized further.
-
Converting Any Resource into a Task:
- This is a powerful feature! Any resource you've saved in Octab (like a bookmark, a note, or a saved file link) can become a task.
- Simply assign a Status (e.g., "Todo," "In Progress") to that resource.
- Once a status is set, the resource will automatically appear in your Tasks page, effectively making it a task.
Part 2: Task Details & Properties
Once a task is created, you have a wealth of options to define and manage it:
-
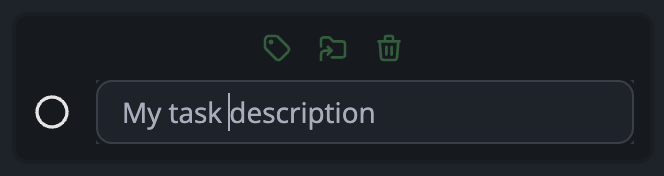
Description: A clear, concise title or summary of the task. You can edit this at any time.
-
Detailed Notes: Need to add more context, sub-steps, or related information? Opening a task (e.g., by clicking on it) will provide an interface similar to Octab Notes, allowing you to add rich text details, lists, links, etc.

-
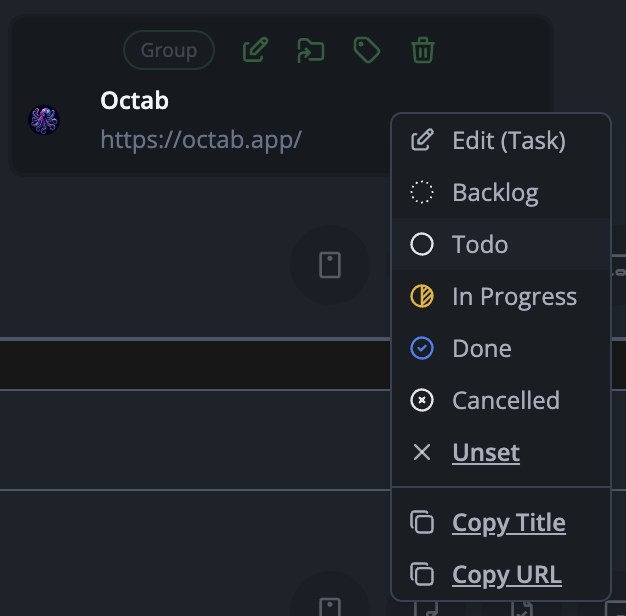
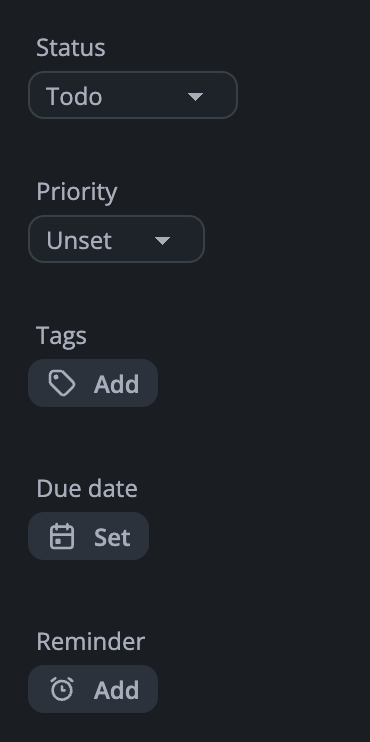
Status: Track the lifecycle of your tasks with predefined statuses:
Backlog: Ideas or tasks not yet scheduled.Todo: Tasks ready to be worked on.In Progress: Tasks currently being actively worked on.Done: Completed tasks.Cancelled: Tasks that are no longer relevant.
-
Priority Level: Assign a priority to help you focus on what's most important:
LowMediumHighUrgent
-
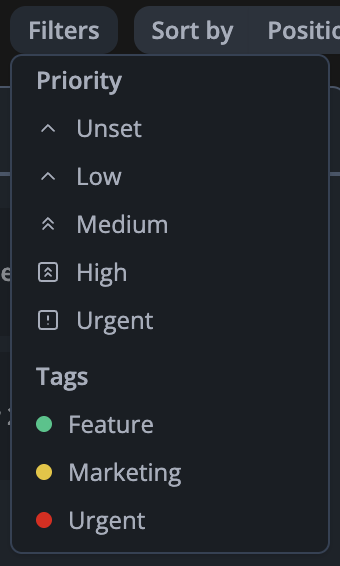
Tags: Assign tags (as covered in the Tags & Groups tutorial) to your tasks for better organization and filtering. This allows you to see tasks related to specific projects, contexts, or themes.
-
Due Date: Set a specific deadline for your task.
-
Reminders: Don't let things slip! You can set multiple reminders for a task. These will trigger a notification at the specified time(s) to ensure you stay on track.
Part 3: The Tasks Page - Your Central Hub
The dedicated "Tasks" page in Octab is your command center for managing all your tasks. It's designed to give you a clear overview and easy control.
Key Features of the Tasks Page:
-
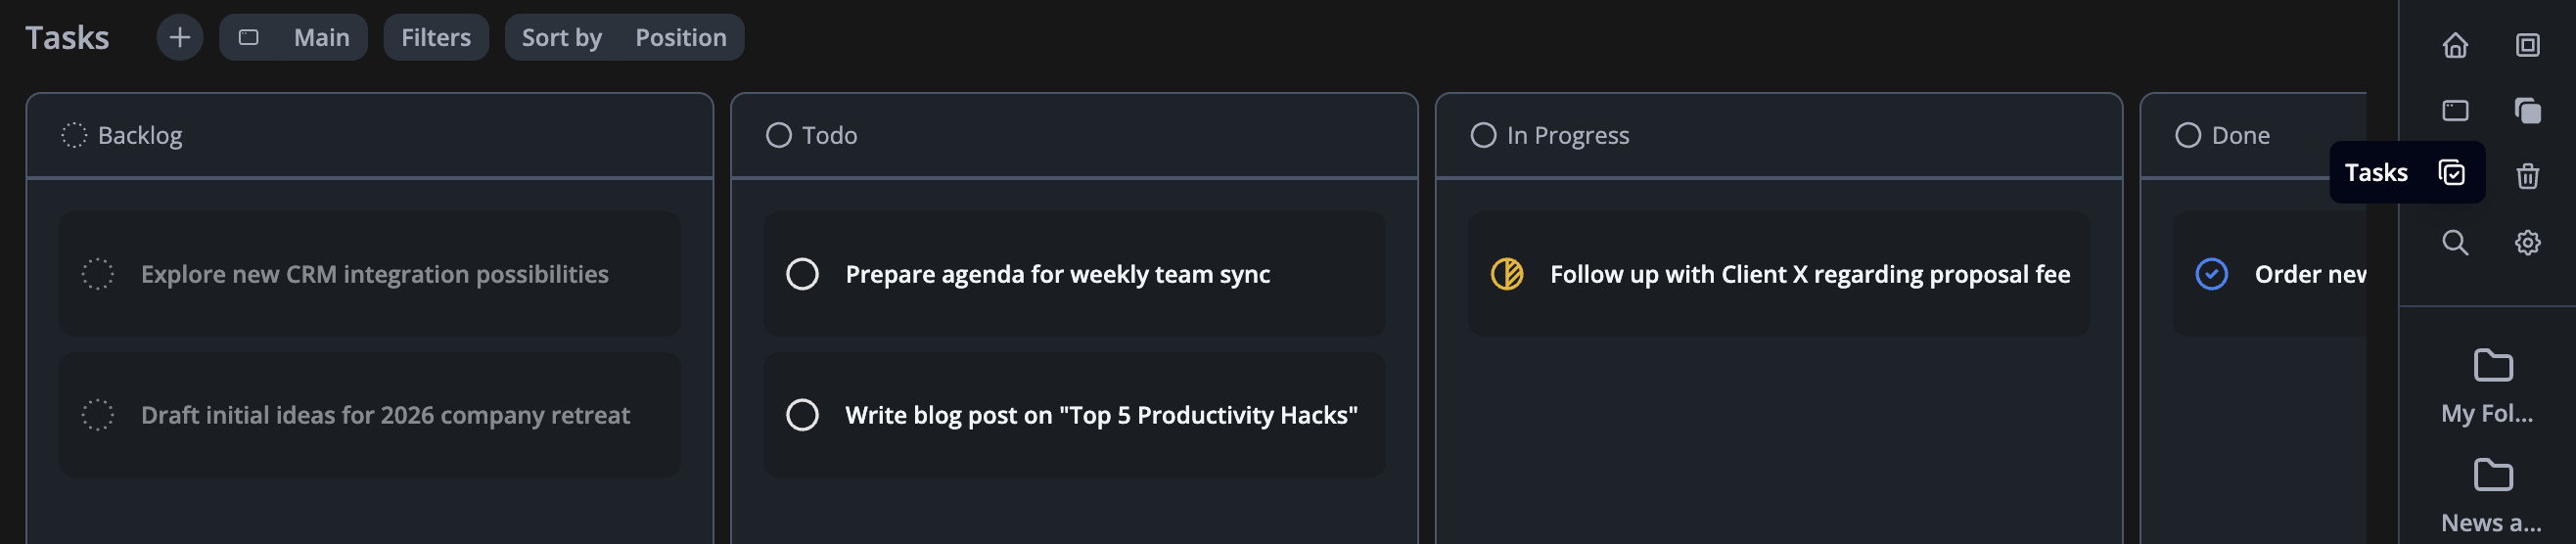
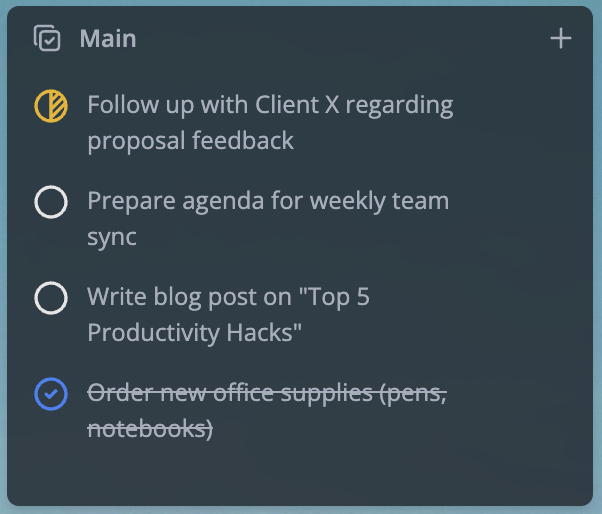
Column-Based Status View (Kanban-style):
- The page typically displays your tasks in columns, with each column representing a Status (e.g., "Backlog," "Todo," "In Progress," "Done").
- You can easily drag and drop tasks from one column to another to update their status.
Top Menu Actions & Controls:
The top menu on the Tasks page provides several actions to help you manage and view your tasks efficiently:
-
Create New Task (Plus Icon
+):- Clicking this icon will create a new task, which will automatically be assigned the "Todo" status by default.

-
Filtering:
- Filter by Priority: Display only tasks matching selected priority levels (e.g., show only "Urgent" and "High" priority tasks).
- Filter by Status: Further refine the tasks displayed within the current view based on their status (useful if your view combines multiple statuses or if you want to temporarily focus).
-
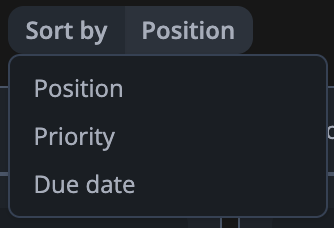
Sorting:
- Organize your tasks within the columns or list based on:
- Priority: View tasks from Urgent to Low or vice-versa.
- Due Date: See tasks by their upcoming deadlines.
- Position: This option allows for manual ordering. You can drag and drop tasks within their column to arrange them in your preferred sequence.
- Organize your tasks within the columns or list based on:
-
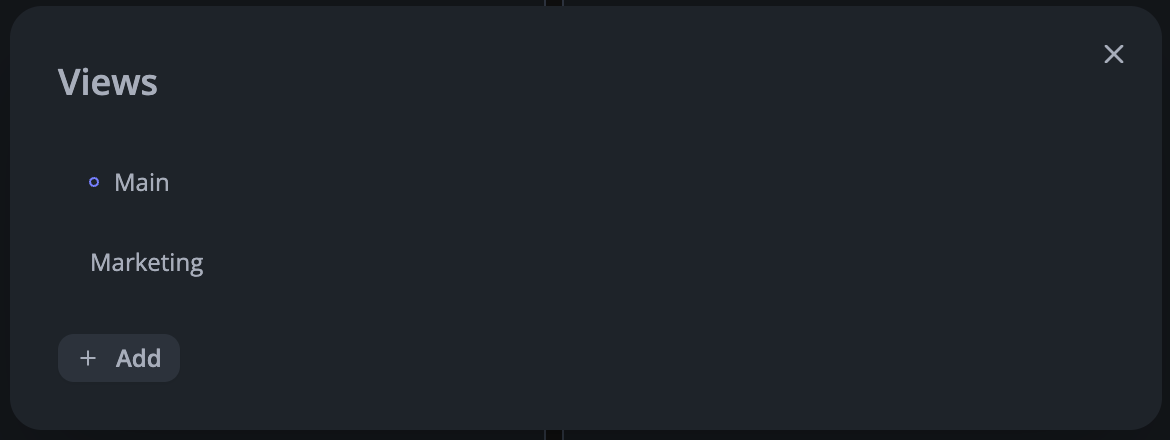
Views:
- What are Views? Views are a powerful way to create and save different configurations for displaying your tasks. Each view can have its own unique set of filters (Priority, Status, Tags) and sorting preferences. For example, you could have a "Today's Urgent Tasks" view, a "Project X - In Progress" view, or a "Backlog - Low Priority" view.
- Managing Views: By clicking on the "Views" icon (often a symbol like an eye or layout icon):
- Visualize the different views you have already created.
- Select a view to apply its settings.
- Create new views by setting up your desired filters/sort order and then saving it.
- Delete views you no longer need.
Part 4: Tasks Widget on Your Homepage
Bring your tasks front and center by adding a Tasks widget to your Octab Homepage.
- Edit Homepage: Access the customization mode for your Octab Homepage.
- Add Tasks Widget: Select and add the "Tasks" widget.
- Select a View: Configure the widget to display tasks from one of your saved Views. This means you can have a specific subset of your tasks (e.g., "Today's Todo") visible every time you open a new tab.
By leveraging Octab's comprehensive task management features, you can streamline your workflow, stay organized, and ensure nothing important falls through the cracks. From simple to-do lists to managing complex project tasks alongside your saved web resources, Octab Tasks is a versatile tool for productivity.